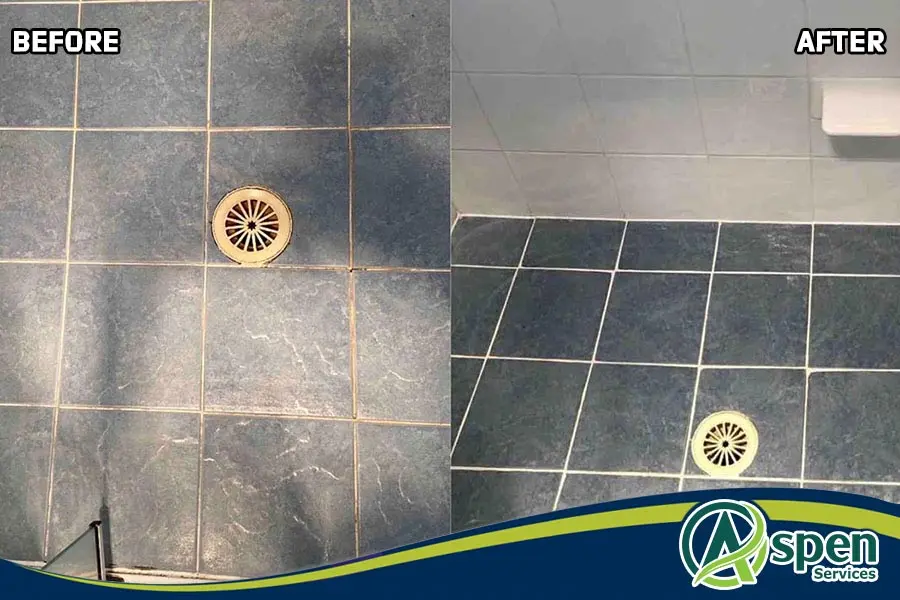
Do you want to remove your old shower grout and replace it with brand new shower grout? No worries! Today, in this post we will show you how to regrout a shower and all the materials you need to complete this time-consuming shower regrouting effectively.
Let’s dive into the topic!
1. Materials Needed for Shower Regrouting
Like any other cleaning, shower regrouting also needs some basic materials and tools to complete the job more easily. For any shower regrouting cleaning, make sure you purchase these below things:
- Utility Knife
- Grout Remover or Grout Rake
- Vacuum
- Caulk
- Grout (waterproof)
- Grout Spreader or Grout Float
- Mixing Bucket
- Putty Knife or Grout Mixing Tool
- Sponge & Cleaning Supplies
- Dusk Mask
- Goggles
- Masking Paper
Now, let’s check out the tools that can make your shower regrouting process easier and less time-consuming. In addition to all the materials listed above, we recommend you to purchase the below things:
- Electric Grout Remover
- Caulk Gun
- Stain (Colours Grout)
- Grout Enhancer
- Grout Saw
- Scrub Brush
- Gloves
2. How to Remove Grout?
Over time, grout has settled into place and formed a very hard surface in between all your bathroom tiles. If you use a standard grout removal tool, the cleaning process will be labour-intensive. In fact, that is why hiring a professional shower regrouting service provider is a bit expensive. To cut down on the intensity and labor of the shower regrouting cleaning, you could purchase an electric grout remover. It’s high-speed and effortlessly chews away old grout, also guides you between the tiles that prevent tile repairs.
Whatever tool you use, don’t forget to put on your goggles, dusk mask and rubber gloves before you start the work. Also, cover the tub and surrounding areas with masking paper, and if you are working near the drain, cover that as well. At the same time, turn on your bathroom fan and open all windows and doors.
Take your shower grout remover and place the blade tip directly on the grout. Then, firmly move across the grout as if you were butterflying a piece of chicken. Begin in the middle of the shower and move the way out. First, do the grout removal in the vertical lines, then move onto the horizontal lines.
Remember, in order to remove the tough shower grout, a little elbow grease will be needed. Also, be careful not to cut any of your existing tiles. Once you have removed all the old grout of your shower, clean the tiles with your chosen bathroom cleaning supplies.
3. How to Regrout A Shower?
Before you choose the grout, make sure you take an extra piece of your bathroom tile, or a picture of your bathroom tile, so that you can find out the right type and colour that go best in your shower.
Once you have completed the cleaning process, you can start mixing your grout (some grouts will come in ready-mixed forms). If you are mixing grout yourself, make sure to only mix the amount of grout that you will use in 30 minutes. Otherwise, the grout may become hard.
You can mix the grout with water or a grout enhancer. Grout enhancers can boost grout durability and stain resistance. Mix the grout using your putty knife until it becomes a creamy paste. Then, place a chunk of grout on your grout spreader. For larger showers, use a grout float, it will help you save your time and energy. Apply the replacement grout at a 45-degree angle. Work into the spaces between tiles so that you can make sure there are no air bubbles or gaps. You may have to use the edges of a grout spreader to push the remaining grout into its right spots. Don’t take breaks as the grout can harden in 30 minutes or less.
Once you are done with grouting, clean off all excess grout from the surface with a wet sponge. In case you accidentally remove any necessary grout while cleaning the surface, by using a putty knife you can add some grout back in the needed spots. If you wish, you can now apply new caulk to the outskirts of the shower. New caulk makes sense when you are doing a shower regrouting
After the grouting process, let the grout for 30 minutes to harden and then use a grout saw to even out the appearance. You need to let the grout sit for another three hours to settle, after that use some wet paper towels to remove the remaining powdery film.
Conclusion
Usually, shower regrouting takes lots of time and energy to complete the job effectively. However, this post explains how it’s done. So, now, you can do the shower regrouting effectively by yourself.

