Why you should consider pressure washing services for your home

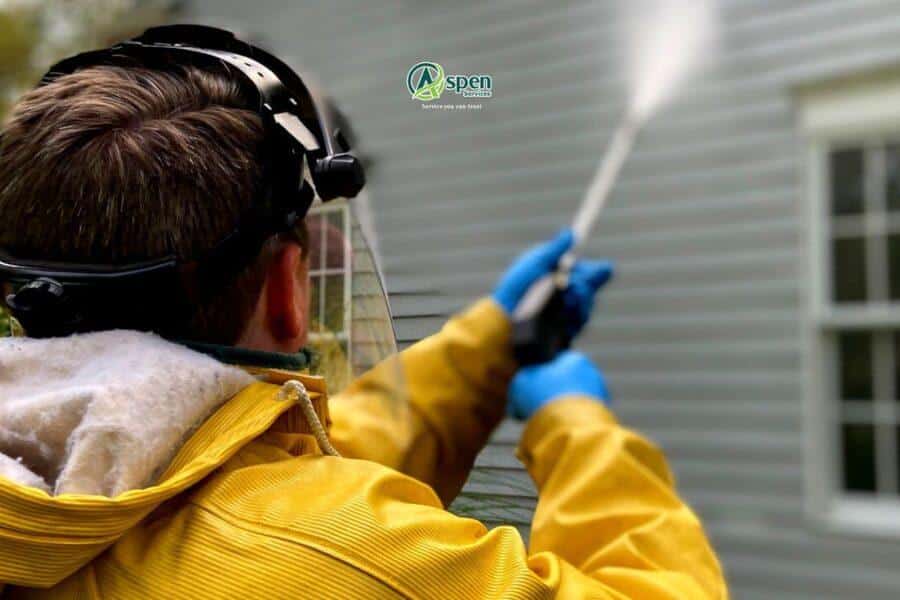
Why you should consider Pressure Washing Services for your home

Remember the look and feel of your home when you first moved in? The spotless driveway. Squeaky clean exterior. Are you ready to reinstate that original glory? Our pressure wash service might be the simple answer to all your cleaning needs. Read on to find out how our pressure wash services can help to make your home beautiful again.

Benefits of Pressure Washing

Cleaning out the dirt, algae, and grime can prolong the life of the exterior surfaces in your home. Dirt particles, sand and moss, can cause damage to concrete, wooden deck and sidings in the long term. Our pressure wash service can ensure that these surfaces stay in peak condition.

Pressure washing Brisbane area properties is one way to effectively remove mould, organic debris, and years of built-up dirt. This can not only make certain your home front looks good, but it can also increase the value of your property. Let’s look at the other benefits of professional pressure washing Australia and why you should hire an expert to do the job.

  • Pressure washing can get rid of mold and mildew, making your home hygienic, and therefore protecting the health of your loved ones.
  • It can prevent deterioration of your external surfaces, which can prevent the need for repairs keeping your property in good shape.
  • Unlike an inexperienced individual, a professional pressure washer with commercial equipment can prevent property damage.
  • Pressure washing is the perfect way to go if you are preparing an area for painting. It can clear away any old paint and gunk dangling from the surface and create a smooth surface that can enhance the paint job’s efficiency.
  • Last but not least, it enhances the curb appeal of your property. Therefore, if you are planning to sell your house, you can get the best value in the market.

Why You Should Hire a Professional Pressure Wash Service

The first thing that might come to your mind is, “I can do it myself.” There’s no doubt you can do it yourself, but you might not have the commercial equipment, the experience and the expertise to ‘DIY’ a pressure washing project.

Furthermore, it can be dangerous to attempt to use industrial pressure washing equipment without knowledge and experience. Therefore, it’s ideal to allow an expert to handle the project to prevent unnecessary accidents. All you have to do is get on your browser and search for ‘pressure wash service near me,’ and make that phone call.

Finally, hiring a professional can save you plenty of time and money which you can invest in more important things.

Hiring Aspen Services For Your Pressure Washing Task: How It Works

Step 1: Call our hotline at 1300 461 926 and describe your requirement.

Step 2: A professional from our team will choose a convenient time that suits you and come in for an inspection.

Step 3: The cost of pressure wash services can vary depending on your requirement and the surface that requires pressure washing. Our professionals from Aspen Services will explain the procedure that is required to provide the best outcome and give a clear price quote.

Step 4: We will discuss a date and a time convenient for you and send one of our experts to take care of the pressure washing project.

Pressure Washing FAQs

How often should you power wash your house?

As we highlighted above, pressure washing a home has several benefits. It might get you wondering why people don’t pressure wash their homes every week. The answer is simple. When you pressure wash too often than necessary, it can damage the paint or the external surfaces. On the other hand, if you neglect to pressure wash your home as often as required, the environmental factors can lead to long-term deterioration resulting in the requirement of heavy repairs.

So how often should you pressure wash your house? There are a few straightforward situations which call for a power wash.

  1. As a part of routine maintenance
    Generally speaking, most professionals advise that you clean your home every six to twelve months (or one to two times a year). Regular power washing will help you keep your home’s exterior beautiful while preventing the growth of mold or mildew.
  2. When you plan to sell the house
    Another great time to use a pressure wash service for your property is when you plan to sell it. After all, the value and marketability of your property are significantly influenced by its curb appeal. Of course, you could live in your house for a long time before you consider selling it. Therefore, even while you should give it a thorough cleaning before selling it, this shouldn’t be the only time you use power washing.
  3. Painting the house
    Using a pressure washer surface cleaner on your house can assist get rid of any old, flaking, or chipping paint so that a fresh coat will adhere to the surface better. Therefore, it’s important to power wash your home exterior properly before applying paint to your house.

How long does it take to power wash a house?

Pressure washing a house can take anything from 30 minutes to 3 hours or longer. Furthermore, it depends on the size of the property. For instance, a 2,500-square-foot home with one story may take around an hour.

Can you damage concrete by power washing?

In the hands of an inexperienced person, pressure washing can damage the concrete surface. The most common causes of pressure washing damage include using the incorrect nozzle, using too much pressure, spraying too near to a concrete surface, and keeping the nozzle stationary for an extended period of time.

However, when you hire a professional to do the job, you can rest easy knowing that your concrete driveway or patio is in safe hands.

If you feel your property needs pressure washing, get in touch with Aspen Services today. We have years of experience in pressure cleaning. So, you can count on us to get rid of algae, dust, mold, and mildew off the surfaces of your home. If you require a shower repair or you are thinking of restoring your bathroom, check out our article How to Save Money and Restore Your Bathroom With The Best Shower Repairs in Brisbane.

Pressure washing tips for absolute beginners

Most Essential Tips on Pressure Washing Every Beginner Should Know

Are you ready to get rid of the dirt and grime and reinstate the kerb appeal of your home front? We are here to guide you on how to bring the outside of your home back to life with the right tools and techniques.

The correct tips on pressure washing can save you precious time. So, check out our pressure wash tips below, finish the job faster, and indulge in more entertaining activities than outdoor cleaning for hours and hours.

Tips On Pressure Washing For A Successful Clean

Before you attempt to hose down all of the dusty and dirty surfaces in sight, there are a few things you need to take into consideration.

Tip 1: Use The Right Nozzle

Pressure washers come with various nozzle tips. Each of them is meant to handle a specific type of cleaning task. You can use a rotating nozzle to power wash most of the areas. However, when it comes to tasks like removing tough stains on a concrete surface, you need a concentrated stream of water. You need high-pressure hosing in such instances, and using the direct stream of water is ideal. But, you need to be extra cautious when you use it. Unless you are aware of the do’s and don’ts of pressure washing, it causes serious injury to you or the other areas of the property.

Tip 2: Don’t Start Closer; Always Start Away From the Surface

It is always advisable to start pressure washing, maintaining a comfortable distance from the surface. If you start too close, you can blow a hole through an exterior siding or take the paint off the surface.

Therefore, in the beginning, keep a safe distance. At least keep a few feet apart between the surface and the tip of the nozzle of your pressure washer. You can start moving towards the surface when you are completely certain that the pressure washer is cleaning and agitating the surface without causing damage to the area in focus.

Tip 3: Do Not Pressure Wash On Top of a Wooden Roof

Never pressure wash a wooden roof if the wood beneath your feet is getting wet. The minute the wood gets wet, it turns into a ‘slip n slide.’ If you slide down and fall off the roof, you can sustain severe or life-threatening injuries depending on the height you fall off. So, when it comes to a wooden roof, we do not recommend ever getting the wood on the roof wet while you are standing on it.

Tip 4: Learn the Correct Technique for Using A Pressure Washer

The biggest advantages of a pressure washer are its speed and strength. However, underestimating the power of this tool and using it in an incorrect way can be dangerous. Therefore, adhere to the right techniques recommended by professionals.

The easiest way to start a pressure washer is to grab and pull the trigger, hold the trigger, and then pull the pressure washer. If you do not hold the trigger down, a lot of pressure tends to build up behind the pump. That makes it hard to pull and start your pressure washer. So, squeeze the trigger, and start your pressure washer to get it going. Afterwards, release your pressure washer, and the pressure will build up appropriately without too much force.

Another handy little tip is to always put your nozzle on the tip of the pressure washer before you pull the trigger. Squeezing the trigger without a nozzle could damage the tip, and you will require to fix the damage before attempting to restart the pressure washing job.

Getting a pressure washing job done is a piece of cake if you can accurately comprehend these pressure washing tips. Now let’s take a look at how to pressure wash a surface efficiently.

How Do You Pressure Wash Effectively?

After setting your pressure washer as per the instructions on the manuel, always refer back to the tips we have highlighted above. Go from top to bottom on vertical surfaces, so the dirt collects at the bottom, and you can clean it all off in the end.

If you are unsure of how to pressure wash without causing damage to the surfaces of your household, you can get the help of a professional pressure washing service like Aspen Services.

What Should You Not Do With a Pressure Washer?

There are a few common mistakes you want to avoid while pressure washing.

1. Forgetting to angle the pressure washer

When you approach the surface to be cleaned at an angle, it helps to lift up the dirt off the surface. On the contrary, if you spray directly, you can drive the dirt deeper under the surface.

2. Forgetting to wear safety gear

Putting your safety first is vital when you use a high-power tool like the pressure washer. A narrow stream of water at extremely high pressure can slice through skin and flesh. Therefore, always wear covered shoes and be attentive when using the pressure washer.

3. Using the wrong nozzle

The size of the nozzle plays an accurate role in the strength of the water pressure coming out of the pressure washer. Using the wrong nozzle on the wrong surface can easily cause damage to your property.

How Do You Pressure Wash Fast?

Using a rotating pressure washer nozzle is a surefire way to enhance the efficiency of pressure washing cleaning. However, this might not be suitable for every type of pressure washing job. So, hiring a professional is the fastest way to get a pressure washing project over with. Best high pressure cleaners have years and years of experience under their belt. Therefore, they are quite capable of getting a pressure cleaning job done faster than an inexperienced ‘DIYer.’

We hope our tips for pressure washing come in handy. Stay tuned to this space to learn tips for pressure washing a house. We will also discuss how to pressure wash roof tiles and other different types of surfaces.

If you are looking for tips for pressure washing driveway, check out our blog, How to Clean A Concrete Driveway.

Aspen pressure cleaning: concrete sealing brisbane

The Process of Concrete Cleaning and Sealing

Concrete sealing Brisbane can be a daunting job unless true professionals handle it. There are thousands of indoor, outdoor and driveways in Brisbane and surrounding areas that have concrete surfaces. With proper treatment and maintenance of concrete surfaces in Brisbane Northside and other nearby areas, you can be the owner of one of the most attractive flooring surfaces in the neighbourhood. Also, concrete surfaces are durable, stain-resistant, and incredibly simple to maintain. Therefore, if you have concrete flooring, you’re already in luck.

However, concrete sealing Sunshine Coast and nearby areas are important for the best appearance of the surface. Also, it ensures long-lasting durability. Polished concrete is porous. Therefore, it needs to be sealed to maintain its attractiveness and safeguard it from everyday spills and regular wear and tear. Concrete sealing office car parks and larger driveways can seem complicated and time-consuming. Therefore, you might be considering getting an expert to help out.

Whether your concrete surfaces are large or small, sealed or not, Aspen Services can help. Once you entrust your concrete sealing project with an expert concrete sealer in Brisbane like Aspen Services, we ensure that your concrete surfaces look their best in the years to come.

Aspen Services professionals are the best concrete sealers in Brisbane and surrounding areas. Your polished concrete surfaces will be stain protected for the longest time. Furthermore, they will look their absolute best after we are through with your concrete cleaning or sealing job. Additionally, we guarantee the best concrete sealing price you will ever come across.

Concrete Sealing Brisbane Uncovered: FAQs

Q. How much does it cost to seal coat concrete?

A. The cost can vary depending on the type of concrete surface that needs to be sealed, the quality of concrete, whether it is stamped or unstamped, and the labour cost. The average concrete sealing cost per square meter can range from $13 – 19. Call Aspen Services on 1300 461 926 to get the best rates in the area.

Q. Is sealing concrete a good idea?

A. Sealing your concrete surface for long-lasting attractiveness and durability is highly recommended. A sealant protects the concrete surface from moss, mould and degradation due to the constant wear and tear. Also, keep in mind that sealing is necessary if you have a stained or etched concrete patio or a driveway.

Q. Are concrete sealers worth it?

A. Concrete sealants for outdoor spaces are not only worth the money but also essential for long-term maintenance. Without this additional layer of defence, the concrete is prone to discolouration. Furthermore, it will absorb moisture and start to crack and break off. Therefore, any professional would highly recommend you seal your outdoor concrete surfaces.

Q. What is the best concrete sealer in Australia?

A. There are various concrete sealers in the market, each of which has properties that help protect your concrete surfaces. Most experts widely use penetrating sealers and film-forming sealers such as Protectacrete, Protectaseal, Protectaseal Enhancer, Limestone Emulsion and Protectasilane to seal solid surfaces. Each sealer has unique properties, which work in different ways to act as a barrier between the surface and the exterior elements, which can cause damage to the concrete.

Q. How do you seal concrete in Australia?

A. Before attempting concrete sealing Brisbane, the first task is to identify the correct sealer that suits your requirement. The next steps are cleaning the surface, applying the sealer and maintaining your concrete flooring. It’s vital that the surface is clean and dry before you attempt to apply a sealer. It makes sure the sealer bind and adheres to the surface. After putting on your protective gear, you can use a roller or a sprayer to apply a thin layer of sealer to the concrete surface. Let the coat dry, and then reapply another thin layer of concrete sealer for best results.

Q. When can you seal concrete in Australia?

A. After the initial concrete application, it is important to give the surface about a month to dry and settle completely. Once the surface is completely free of moisture, you can apply a suitable concrete sealer. Depending on the intensity of use, you can apply a sealant every three years.
Concrete resurfacing Brisbane cost varies depending on the type of concrete surface.

Q. Do penetrating concrete sealers work?

A. Penetrating sealers are an excellent choice to protect your concrete surface and offer long-lasting benefits. They form a robust barrier between the surface and the external environment, protecting the flooring from moisture, moss, and damage. The best part is penetrating concrete sealers does not alter the appearance of the substrate. Instead, they penetrate the concrete and form a hydrophobic barrier.

Q. What is the best sealer for a garage floor?

A. Most people will agree that the multi-coat epoxy and polyurethane sealants make ideal garage floor sealers in terms of quality, endurance, and appearance. These coatings provide an outstanding finish while offering the best performance in protecting your garage floor.

Q. How long will my new sealed concrete last?

A. It can vary depending on the coating you use to seal the surface. Acrylic topical coatings have the shortest durability. Therefore, you need to reapply it every one to three years. Epoxy and urethane sealers have a lifespan of five to ten years. Reactive penetrating sealers are known to be the longest-lasting concrete coatings. The only time a reactive penetrating sealer has to be replaced is if the substrate surface begins to wear away. However, it is recommended to re-seal concrete surfaces every five to ten years.

Q. What is the process of the concrete sealing job?

A. Before sealing concrete, all dust and grime build-up must be removed using a high-pressure clean. After thoroughly cleaning and drying the surface, you must tape all exposed parts to protect the walls and other surfaces. You can then apply two coats of paint to the concrete, and after the paint has dried, you can take off all the protective tape.

How to save money and restore your bathroom with the best shower repairs in brisbane

A bathroom is one of the busiest areas of a household. Therefore bathrooms need to be entirely functional in addition to being aesthetically pleasing. Years and years of exposure can turn even the most aesthetically pleasing spa-like bathroom into a discoloured, run-off-the-mill space. No matter how well you look after your bathroom, the constant wear and tear can result in dated tiles, mouldy grout, leaking showers and damaged shower screens.

Most homeowners want to believe that these are simple DIY tasks. However, the truth of the matter is that an inexperienced layman can do more damage trying to repair a bathroom, which can lead to additional and unnecessary expenses. Therefore, when it comes to tricky bathroom repairs, you might want to leave it to the professionals.
Let’s see how professionals in shower repairs in Brisbane can save you time and money.

How A Professional Leaking Shower Repair in Brisbane Can Give You More Value for Money

Most of us tend to postpone simple tasks like leaking shower repairs in Brisbane due to the immediate labour and cost involved. However, you could be losing more money by putting off fixing problems around the house in an effort to save money because they might actually end up costing more in the long run. Besides, it might not be as expensive to repair these issues as you would think.
For example, consider worn-out shower grout. Cracked grout can do more damage than just looking old and untidy. It allows water to seep into the substrate allowing moisture to build up behind the shower walls. The dampness can cause the tile to loosen up and lift away from the substrate.

Additionally, it becomes the perfect environment for mould growth. Therefore, ignoring worn-out shower grout can result in expensive repairs and be hazardous to your health.

How Aspen Services Take Care of Shower Repairs in Brisbane

Shower Regrouting

Let’s consider the example of worn-out shower grout. How do professionals from Aspen Services bring your grout and tiles back to their original state?
Shower regrouting is not a straightforward one-step process. After all, shower tile grout is the boundary between the wet shower area and the structure underneath your floor tiles and shower wall tiles. Therefore, water leaks caused by improper application of grout can literally cause a lot of problems to your home. Therefore, it is of utmost importance that you let a trained professional do the job.

The first step is to remove all the loosened and damaged grout. It takes expert hands to remove the grout from all the edges of a tile. Once removed, the area needs to be cleaned entirely before applying new grout.

The second step is the application of new grout. When it comes to this stage, it is vital to take care not to damage the tile quality with grout haze. This means the person handling the project needs to know the perfect time to wipe away the excess grout. Also, most professionals apply a protective film over the tiled surface. This practice can make sure the tile retains no damage.

The final step involves sealing the grout installation. It’s an important step to provide additional protection, which will prevent water and other dirt particles from entering the grout’s pores.

The experts at Aspen Services have years of experience and knowledge of the tile regrouting process. Therefore, leave your tile regrouting process to us for exceptional results.

Shower Screen Repairs Brisbane

The shower is one place that will be occupied at least once a day, every day, for years and years to come. Therefore, any damage to the shower screen is not a job that you should ever postpone. Putting off a shower door repairs Brisbane can compromise your family’s safety. So, it’s vital that you let shower screen repairing experts do a quality repairing job.

If you try to fix your shower screen yourself without the experience and the expertise, you risk doing more damage to the screen, especially the glass component. Therefore, whether you require to fix a malfunctioning door or upgrade the glass in your shower screen to safety glass, you can count on the professional expertise of Aspen Services to get your shower screen back on track.

Aspen Services take pride in using state-of-the-art hardware for your shower screen repairs. Therefore, you can rest easy knowing that your shower screens will look great and function efficiently for a very long period.

Leaking Showers

Over time, buildings move due to changes in weather, which can cause stress to certain areas of your home structure. Consequently, the process can cause cracks in your walls near the ceilings, near window corners and the corners of the doors.

The bathroom is no exception to movement over time. As the home structure shift, the grout can experience cracks due to weakening. This enables water to penetrate areas of the home’s structure that would typically not enter otherwise.

Water seeping into the wall structure can cause a great deal of harm to your home. Therefore, you need to address a leaking shower problem immediately. The failure to do so will likely become a nightmare requiring exhaustive and expensive renovation.

So, what steps should you take at the initial signs of a leaking shower?

1. Completely stop using the shower. However, that will not be a practical solution at all.

2. Fix it yourself to save money. That’s not only a recipe for disaster, but you might also actually end up having to spend a lot more money to get the job corrected.

3. Remove the tiles and replace the waterproof membrane layer. It’s a very effective solution. However, it will cost you a lot of money and, more importantly, a significant amount of your time.

4. Call the professionals at Aspen Services to seal your leaking shower with a penetrative sealer. The procedure will only take a few hours and guarantee value for money.

Aspen Services: Your Neighbourhood Licensed Professionals in Leaking Shower Repairs in Brisbane

At Aspen Services, we use cutting-edge technology, hardware, and equipment to fix shower leaks and shower screen repairs. Our licensed professionals are well trained and equipped to carry out leaking shower repairs and other bathroom repairing and maintenance services you need. We use globally recognised, tried-and-tested methods to fix leaking showers and other renovations required to restore bathrooms.

Every Bathroom and Shower Repair Service You Need in One Place

We work closely will all our clients and are dedicated to providing unparalleled customer service. We aim to deliver your shower repair project on time, with minimal cost.

So, call us today and get a free quote. One of our experienced consultants will inspect and assess your area of concern and explain the procedure required to reinstate your shower to its original state. Once we receive your approval, we can fix a date and time convenient for you and repair your leak with zero hassle.

How to clean a concrete driveway

Driveway Cleaning: Best Techniques on How to Clean a Concrete Driveway

A clean driveway can do much more than improve the overall appearance of your home front. Did you know that a dirty driveway can result in the growth of mold, algae, and moss, all of which can result in damages that can require extensive repairs? Therefore, having a clean driveway makes sure you save up on the time and cash you spend on repairs and rebuilding.
There’s a night and day difference between a clean driveway and one that has not seen a good driveway cleaning in years. Furthermore, in tropical climates, the weather conditions and humidity contribute to algae and mold growth. In addition, wheel marks, oil stains, and other chemicals tend to leave behind filthy-looking stains all over your driveway.
Are you wondering how to remove all those stains, so your driveway looks squeaky clean and presentable again? Continue reading to find out some tried and tested methods by the experts that will guarantee a spotless clean concrete driveway.

Driveway Cleaning Basics

There are a few straightforward techniques you can use in cleaning driveways. Let’s take a look at a step-by-step approach to cleaning concrete driveways.

Step 1: Clear out the area before pressure washing driveways

Remove any loose debris, such as dirt, stone, and other particles, from the driveway surface. You can brush or use a leaf blower for this purpose. Additionally, ensure that the driveway is free of other objects such as toys or bicycles. Also, don’t forget to remove any furniture or potted plants from the area you will be pressure cleaning.

Step 2: Decide on the right cleaner that can tackle the stains in your driveway

What is the best cleaner for a concrete driveway?

It is preferable if you use a specialized product to tackle the specific types of stains in your driveway. Cleaning concrete driveways become much easier once you identify the types of stains you must remove.
For general cleaning purposes, you can use a concrete driveway cleaner available in your local home improvement store. Let’s take a look at how you can deal with different types of stains.

How to clear mold and mildew from your concrete driveway

If your driveway is located in a shaded area, you will likely encounter an issue with mold and mildew. Furthermore, this is a reality when humidity exists, and the air is moist. Therefore, you may use a mold-killing detergent to get rid of these. Another trick is to make a solution by combining a cup of bleach with a gallon of water and applying it to the surface. Then, scrub the area thoroughly. This is one of the easiest ways to get rid of mold and mildew.

How to get rid of tire marks from your driveway

The unsightly skid marks you notice on most driveways are a result of the concrete surface getting exposed to wheels for long periods in hot weather. The rubber’s polymer constituents react or adhere to the concrete when heated. Unfortunately, these marks are water-resistant and won’t come off with a quick wash.
In this case, you will have to apply a degreaser and scrub it to loosen the stains. After that, you have to pressure wash the driveway. If you plan to use a pressure washer just a few times a year, it’s best you rent one or hire a professional. Additionally, an expert pressure washer driveway cleaner can save you more money and time than buying your own pressure washer and learning how to use it safely.

How to eliminate fertilizer stains from your concrete driveway

Applying an acidic solution is the key to getting rid of these stains. Therefore, a quick remedy is to mix equal volumes of white vinegar and water and apply the solution to the stains. You might have to apply the vinegar to the stain more than once and scrub hard to remove fertilizer stains completely.

How to clean leaf and other organic stains from your driveway

Organic stains such as leaf stains, tree sap, and other organic material are some of the hardest stains to remove when cleaning a concrete driveway. Therefore, these stains require cleaners and detergents that specifically target organic material.
However, the first step is to get a driveway pressure washer and get rid of all the solid particles and debris from the area that needs cleaning. Afterward, you can apply a detergent that specifically targets organic stains. Allow it to sit for a few minutes, and scrub thoroughly. The final step is to rinse away the detergent.

Are you still finding it challenging to rid your driveway of dirt and stains?

If all else fails, don’t lose hope. We have a few last tips that might be helpful regarding cleaning driveways. Check out the tips below before you resort to replacing your driveway entirely. That should be one of the last resort.

Tips for concrete driveway maintenance

1. Reseal your driveway by reapplying the sealer.
2. Remove any dirt, grease, or organic matter as soon as they fall on the driveway.
3. Do not use deicing chemicals.
4. Refill the sand in the small area between pavers on your concrete driveway.

Step 3: If all else fails, that might be an indication that your driveway needs an expert’s touch.

Need Expert Help? Call Aspen

Sometimes cleaning a concrete driveway is not as simple as you might think. When all the DIY methods fail, it’s best to call upon the experts to handle the situation. This is especially true when it comes to driveway pressure cleaning. If you are a novice using a pressure washer, it’s wise to consult a professional before taking matters into your own hands.
When it comes to Gold Coast driveway cleaning and cleaning concrete driveways in Brisbane and surrounding areas, Aspen has years of professional experience. Therefore if you are seeking an expert driveway cleaning service, give Aspen cleaning services a call today to get a quotation.

The ultimate concrete driveway cleaning and sealing guide

Concrete driveways are beautiful additions to any home, but they are also among the most difficult surfaces to clean and seal properly. Follow this concrete driveway cleaning and sealing guide to keep your driveway looking good as new even after years of sun exposure, rain, mud, and dirt.

Concrete Driveway Cleaning and Sealing Guide

1: Prepping the Surface

When you do your concrete driveway cleaning, it’s important to make sure that everything is prepared correctly. To prepare your driveway, first, remove any loose debris from your driveway using a broom or blower. Then remove the old sealant and any dirt, grease or grime that has built up over time.

2: Clean the Surface

Once the old sealant has been removed, wash the surface of the driveway thoroughly. You can use a pressure washer for larger areas, but most homeowners will want to rent a concrete cleaner from their local home improvement store instead. A concrete cleaner is a liquid that you apply to your driveway with a garden sprayer. The water quickly penetrates into cracks in the driveway and loosens embedded grime that’s trapped between the driveway surface and the overlying sealant. Most cleaners are heavy on detergent, which is why they can’t be used on most driveways until they’ve been stripped down to bare concrete. Once you apply the cleaner, let them soak on the surface for a few minutes then rinse them thoroughly with clean water.

3: Apply Sealer

Applying sealer to a concrete driveway is a crucial step in getting your driveway ready for winter. Like many other surfaces, a concrete driveway also should be sealed every year after it has been cleaned thoroughly. When you are applying sealer to your concrete driveway, here’s what you need to do: First, use a leaf blower or garden hose with a nozzle to clean off all debris from your driveway. Next, spread out an even layer of newspaper that will lie flat on top of your driveway; most sealers say that newspapers are one of the best materials for protecting areas from overspray. Now carefully spray on two coats of sealer; wait at least five minutes between each coat so that it can dry properly.

Conclusion

There are many different methods for concrete driveway cleaning and sealing. Here we shared some of our best recommendations. Hope you found this guide helpful! However, it will be easier if you find an expert who can do the cleaning and sealing of your concrete driveway for you. With proper care, your concrete driveway will give you many years of enjoyment. Once a year, take out time to do your concrete driveway cleaning and sealing in order to keep your driveway looking its best.

Anti-slip coatings for floors and slippery surfaces

An anti-slip coating ensures that your floors, stairs, and other surfaces are safe to walk on. Anti-slip coatings can be applied to concrete, brickwork, wood and any other hard material. There are many anti-slip coatings formulations to choose from depending on the type of surface you need to treat. Let’s learn how to apply anti-slip coatings to your floors and slippery surfaces.

1. What are the types of anti-slip coatings?

There are several types of anti-slip coatings you can use on your floors and slippery surfaces. To ensure you select an appropriate anti-slip coating, we recommend consulting a professional in your area. Epoxy coatings are one of the popular anti-slip coatings that have been shown to reduce fall risk by 50%. Polyurethane is another common option that is less expensive than epoxy but can still greatly improve safety. Finally, it’s also possible to apply various coatings or sealant options depending on what your flooring already looks like.

2. What does a floor coating do?

You might be thinking that slippery floors are simply a risk in everyday life. But if you work in an environment where safety is paramount, or you have young children who have just started walking, then a floor coating might be a good investment. Floor coatings come in many colours and textures. As long as it’s non-slip, it’s probably available. A good anti-slip coating can make all the difference when you’re trying to avoid falls. With anti-slip floor coating, you can enjoy a non-slip, safe walk in your properties.

3. What Does an Anti-Slip Floor Coating Look Like?

A good anti-slip floor coating or sealant is clear, odourless, and doesn’t stain. If you see any noticeable colour in your anti-slip coating, that means that you’re likely using a solvent-based product. The solvent will eat at most flooring materials so it’s important to avoid them entirely; if you want a safe coating for slippery floors or other surfaces (like concrete), opt for an epoxy or polyurethane material.

4. Why is Anti-Slip Flooring Important?

There are many health benefits of anti-slip coatings, especially in places where slippery floors are a real danger. Because slippery surfaces make it so much harder to maintain your balance, also, slips and falls can lead to painful injuries that take months or even years to heal. A slip on a slick floor also increases your risk of losing control of objects you’re carrying—or falling into dangerous machinery—which can cause equally serious injuries. To help prevent accidents, it’s essential that you properly seal and coat any slippery floors in your home.

5. Benefits of Anti-Slip Flooring

Before applying anti-slip flooring you should understand that it is a safety measure for your home or business. Anti-slip flooring helps prevent slips, trips and falls on smooth surfaces. You can apply anti-slip coatings to floors or walls where people might slip. Applying anti-slip coatings on slippery basement steps, garage floors, outdoor pool decks can be very helpful in preventing accidents due to slippery floors. These coatings are waterproof so they will not wash away in rain or snow.

Conclusion

Anti-slip coatings are usually required by building codes and regulations, especially in public spaces like hospitals, schools, office buildings, swimming pools, bars and restaurants. These anti-slip coatings are also recommended for use in your home as well. Anti-slipping coating is an easy way to improve safety without dramatically changing a space. It’s been said that prevention is better than cure – particularly when it comes to health and safety.
If you’re looking for professional anti-slip coatings services, opt for our services here: Aspen Anti-Slip Coatings Services.

How to clean and seal grout on the tile floor?

If you have tile floors, you should know how to do the cleaning and sealing for grout on the tile floor to keep your tile floors looking new and beautiful. Cleaning and sealing grout will not only help you keep your tiles protected but will also increase their lifespan. Besides, prevent dirt, dust, water stains and mold from accumulating on them. However, this process may be a bit difficult if you are inexperienced in the art of cleaning and sealing the grout on the tile floor.So, here are some tips that will help you with this process.

4 Steps for Grout Cleaning and Sealing On the Tile Floor

1. Collect Materials

Before you start cleaning your grout, you’ll need to collect a few supplies. You should pick up an extension pole, grout cleaning liquid or powder, brushes or scrubbing sponges, rubber gloves, a mask or respirator and clear silicone caulk. Make sure you buy high-quality materials because you don’t want any shortcuts when it comes to sealing your grout lines! If you are able to collect the right materials before starting, things will become easier for you in terms of removing stubborn stains and smoothing out rough edges around tiles. If there is dirt stuck deep within the crevices of your flooring, it will be more challenging for you to clean thoroughly with just water.

2. Remove Adhesive, Loose Dirt, Dust, and Debris

Once you’ve vacuumed, start by removing any adhesives, loose dirt, dust, or debris from your tile floors. If there’s lots of debris, you can use a hard bristle brush or even an old toothbrush. To remove scuff marks caused by dirt, try a cleaning sponge that has been moistened with warm water. For stubborn areas where dirt is trapped in grout lines, you can use a scrubbing pad like those used for dishes – just avoid getting too aggressive as you risk stripping away excess grout colour along with those hard-to-remove stains!

3. Apply a Solution

It’s best if you can find a solution that contains bleach, such as OxiClean or another brand of bleaching agent. You can also buy pre-mixed grout cleaner (just make sure to follow the instructions!) or make your own non-toxic mixture by combining one part hydrogen peroxide with four parts water. Apply one of these solutions by pouring it onto your sponge mop, and mopping it across your tile floor, then leaving it for about 15 minutes. After that, use a wet scrubber/brush (like an SOS pad) to scrub away at your grout. You’ll want a bucket or other similar container with warm water mixed with bleach sitting nearby your tile floor while you’re cleaning so that when you finish scrubbing one section of grout, you can dip right back into it and move on quickly.

4. Rinse With Water

Once all these processes are completed, rinse off with clean water. After rinsing thoroughly, be sure to let everything dry completely before sealing or applying wax. That’s all there is to it!

Conclusion

Hope you found these tips helpful! However, it will be easier if you find an expert who can do the tile cleaning and sealing for you. The tile floor is a great asset to your home. It is durable, attractive, and functional. With proper care, your tile floor will give you many years of enjoyment. Take time to clean out your tile’s grout lines once a year in order to keep your tile floors looking their best.

The ultimate guide to pavers cleaning and sealing

Pavers are great options when you’re looking to add extra space or improve aesthetics around your home, but they can be tricky to clean and seal properly. This ultimate guide will give you everything you need to know about pavers cleaning and sealing so that you can get the best results possible in the shortest amount of time.

4 Methods of Pavers Cleaning and Sealing

1. Remove Loose Debris from Your Pavers

The first step to pavers cleaning and sealing is removing loose debris. The easiest way to do that is to use a lawnmower or weed trimmer. Make sure you wear protective gear, such as eye protection and gloves, when using lawnmowers or weed trimmers around your pavers. Also, make sure there’s no loose debris in your garden hoses before beginning to clean your pavers. Finally, be sure that you turn off any automatic irrigation sprinklers before starting so you don’t damage them with high water pressure.

2. Hose Down Your Pavers

The best way to do pavers cleaning and sealing is to hose them down completely. Make sure your pavers are dry before you start cleaning so that your sealant has a maximum hold. Use a stiff broom to remove any dirt or debris stuck in between pavers. You can also use a pressure washer for more thorough cleaning of your pavers, but make sure not to use too much pressure as it may damage them. Rinse off with fresh water after using any chemicals, brushes or cleaners on your pavers.

3. Give Your Pavers A Deep Clean

The first step to giving your pavers a deep clean is to apply a degreaser. Often, these products will include high concentrations of lye or sodium hydroxide that help remove grease, oils, and other substances. If you’re using a pressure washer to clean your pavers, you can follow up with some gentle scrubbing before sealing them. After all, it isn’t any fun having to live in an unclean environment! To get rid of unwanted dirt, it may be worth trying vinegar. This natural cleaning solution comes in many forms and works wonders on stains. It can also cut through grime on stone surfaces like marble, travertine, limestone, slate, granite, porcelain tile and more. To ensure your paver flooring looks as good as new every time, make sure you let it dry thoroughly before walking across it again.

4. Apply Sealant to Your Pavers

After sweeping your pavers, use a pump sprayer to apply a sealant to your pavers. Pump sprayers are more effective at delivering products than a traditional hose-end sprayer because they produce more even coverage with less waste. When you’re done applying sealant, let it sit for five minutes to allow it to fully penetrate into your pavers. Finally, scrub your pavers with a long-handled deck brush or broom to make sure you’ve completely removed any excess sealant (this is an important step). All the pavers cleaning and sealing processes are done! You’re now ready to start enjoying your new patio!

Conclusion

Now, you’re ready to do your pavers cleaning and sealing, right? Don’t get in too big of a hurry. Take your time. A thorough prep job will go a long way toward helping you achieve optimal results with each application of pavers cleaning and sealing. So don’t rush through these steps or overlook anything that could be a potential cause for problems further down the road. Make sure you do all you can before applying a coat of sealer because that quality and durability are directly related to how well your pavers were cleaned and sealed.

Still, you’re looking for a professional pavers cleaning and sealing service provider, contact us here: Aspen Cleaning Services

Top 5 reasons to hire professional cleaning services

If you’re like most people, one of the last things you want to do when you come home from work is to clean your house or apartment from top to bottom. For many, hiring a cleaning service makes sense, even if it means dealing with the hassle of finding one and getting their schedule worked out. To help convince you of the benefits of hiring professionals to clean your home, here are five top reasons to hire professional cleaning services.

1) Cleaning Professionals Offer Peace of Mind

If you’re like many other people out there, cleaning your home probably isn’t your favorite pastime. It may be something you dislike enough that you put it off until a cleaning service can take care of it for you. Even if you do clean your home regularly, you likely don’t have time for more complicated chores such as scrubbing your bathroom tile or polishing your wooden floors on a regular basis. Having professionals to clean your home also means being able to relax and enjoy yourself without worrying about whether or not everything is being cleaned properly and thoroughly.

2) Cleaning Professionals Save You Time

Homeowners typically spend approximately 10 hours a week cleaning. If you clean your home weekly, over time you spend an average of 1,825 hours per year just on cleaning – that’s more than 100 days! The good news is that hiring professional cleaning services can save you time and energy. It doesn’t matter whether you prefer housekeepers or simply need a weekly service for keeping on top of things; either way, getting help with your housework gives you more time to relax and unwind at home. With quality commercial cleaners helping out around your home, there’s no reason not to enjoy relaxing times in your own space.

3) Cleaning Professionals Save You From Stress

Professional cleaning services are better equipped and more qualified. Therefore, if you have a hectic schedule, or just don’t feel like doing it yourself, hiring a professional makes sense. They can help you turn your place into one that is free of dust bunnies and cobwebs in no time. Plus, once you hire professionals, they’ll take care of all that back-breaking work on an ongoing basis so you won’t even have to think about it! You shouldn’t have to sacrifice clean for convenience. Also, it helps you to stay stress-free.

4) Every Detail Matters

Hiring a professional cleaning service is an easy way to ensure that your home gets all of the attention it deserves. Professional cleaners will arrive at your home and devote their undivided attention to giving you back a spotless space, which means every detail will be tended to, including those tough spots in hard-to-reach places. When you pay someone else, they’ll come equipped with all of their own supplies, so you won’t have to worry about figuring out what products work best on what surfaces. Plus, once you hire a professional service, you can rest assured that everything—including bedspreads and curtains—will be laundered for free of pet hair and dander.

5) You Deserve The Best Professional Cleaning Services

You work hard, and you deserve a clean home. Also, your family deserves a happy and healthy environment, free of dust and bacteria! If your home is unhealthy, everyone in your household suffers. Don’t settle for less than excellent – bring in professional cleaning services. they’ll leave your home spotless (or as close as it can be) every time! You have better things to do: Let professionals handle everything from scrubbing bathrooms to sweeping floors – or whatever else is on your clean. After all, you deserve the best professional cleaning services.

Conclusion

Here are five reasons why you should consider hiring professional cleaning services for your home. While most people can handle a deep-clean now and then, it’s not feasible for every household on a regular basis. Now that you know about some of the things a professional can do, don’t put it off any longer! Call us or visit our website today and see how we can help make your life easier.